
How to start and end your webinar
The following article explains what to do when you click on the unique webinar hosting link; including the recommended browser to use, how to start and end the webinar to ensure Learners are correctly awarded their CPD/Learning Time and how to upload your presentation.
The article 'How to access the webinar hosting link' provides details on who should use the hosting link and how to find it.
Getting ready to start your webinar
We've covered in a previous article the importance of ensuring only one person uses the hosting link - this should be the person leading the webinar - and how to access the hosting link. The following steps explain what to do upon clicking on the hosting link.
Step 1: Click on the webinar hosting link and login using your site admin/instructor credentials
The unique webinar hosting link is sent by email to the course creator (the person who originally created the course) and the Site Admin. Guest presenters must be registered to the platform as an Instructor and then emailed the hosting link by a a Site Admin if they are not the course creator.
Please make sure that the hosting link opens in Google Chrome. We recommend that you host the webinar in Google Chrome. Therefore if your default browser is not Google Chrome you will need to copy the link (URL) and paste it into Google Chrome.
IMPORTANT: If Google Chrome is not your default browser, you need to right click the link in the email and select copy, then paste it directly into the Google Chrome browser. You CANNOT copy the link directly from your default browser across to Google Chrome because it will not direct you to the correct page.
Step 2: Connect your microphone to the webinar
Upon clicking the link and logging in you will be prompted to join the webinar with microphone or with audio only.

When choosing to join by microphone your browser may also trigger an alert asking if you want to share your microphone with the application, select ‘Yes’ or ‘OK’ as applicable.
If you do choose ‘listen only’ you will be able to turn your microphone on later by clicking on the headset icon at the bottom of the screen and re-joining with your microphone.
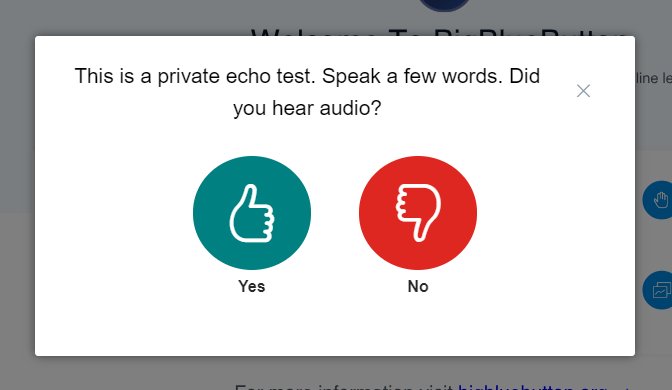
Upon selecting ‘microphone’ you will be prompted to test your microphone settings.
You will then see the webinar hosting page and tools:

Please note that at this stage attendees will not be able to hear you or see anything until you officially start the webinar (see step 4). They will see a holding alert until the event starts.
Step 3: Upload your presentation(s) and configure the classroom to best suit your needs
Uploading your presentation
We recommend that you upload presentations rather than share your screen for long periods of time. Screen share uses large amounts of bandwidth and memory and can cause issues for you or your attendees if they have poor internet connection or low memory on their devices.
To upload your presentation click the + icon bottom left of the presentation area and click 'Manage Presentations'.

You can then upload all the document(s) you require for the webinar. We recommend you upload PDF documents for best results. Please ensure the document you want to start with is selected (green tick) and then click 'Upload'. You will be returned to the webinar hosting page and once converted, your document will be displayed. You can change presentations if required by clicking the + icon again.

Step 4: Configure your webinar settings to suit the way you want to run the webinar.
We recommend that you mute all attendees and lock their cameras. This helps reduce audio feedback, and also ensures that the presenter, and their materials appear more prominently on the screen.
You can always unlock these at any time during the live lesson when you want to encourage active participation.
To configure your user settings, click the cog icon to the right of 'Users' and select 'Lock Viewers'

This will open up the settings page and you can configure the rules accordingly. You can control what your Learners have access to see and do, including whether they can view the public chat or not, share their webcam and connect their microphone.

Step 4: Ensure your webcam is working correctly
If sharing your webcam or desktop as the presenter, you may need to accept a Chrome extension first.
The browser will prompt you if and when you need this. Note for both audio and webcam sharing it can take up to 10 seconds for the connection to be successful.
When you share your webcam you can optionally select the quality. By default it will be set to medium.

Please note, if you want to use a second webcam (e.g. to demo a product) whilst also keeping your webcam live you can follow the following steps:
- Using Quicktime start a screen recording of the iPhone. Please click here for detailed steps.
- Select the Quicktime screen recording window in the BigBlueButton window . Please click here for detailed steps.
How to Start and End your webinar
It's important that the person hosting the webinar starts and ends the webinar correctly as this affects the Learners' CPD/Learning Time.
Step 1: Click 'Start Webinar'
At the scheduled start time of the webinar, an alert will appear centre screen asking if you are ready to begin the live lesson. Please note this alert will not appear if you are in full screen mode.

If you are ready, click ‘Start’ to allow your attendees to connect to the live lesson. Please note it could take a few minutes for all attendees to be connected so it's worth allowing a few moments before starting your presentation. Once you click 'Start Webinar' the active learning tracker will also start recording active and inactive learning time for each attendee.
If you are not quite ready to start your webinar, you may click ‘Cancel’ and when you are ready you can click the ‘Start Webinar’ button in the top right corner of your screen (see screenshot below). Please note that if you are in full screen view you will not see the 'Start Webinar' button so you need to exit full screen mode first. Attendees will remain on the waiting page until you start the webinar.
Step 2: Running your webinar
Once you click 'Start Webinar' your Learners will be able to see what you are sharing in the presentation window (e.g. your presentation and webcam) and will be able to hear you (as long as your microphone is enabled).
Note: If your microphone is correctly connected you will see a blue microphone icon at the bottom of your screen (it will be white if you are muted). If your microphone is not connected you will see a headset icon instead. Click the headset icon to disconnect your audio and then click it again to connect with microphone.

Step 3: How to end your Webinar
Important: You must click ‘End Webinar’ for the system to correctly update attendees’ CPD/Learning Time records.
- Click ‘End Webinar’ at the top right of your screen - you must exit full screen mode to see the ‘End Webinar’ button.

- Confirm you wish to end the event by clicking ‘End Webinar’ on the alert you will see in the centre of your screen.

This will trigger an alert to your attendees to validate their attendance and calculate their verifiable CPD time if applicable.
The attendee has two opportunities to log their attendance formally:
- At the end of the webinar, they will see the following message centre screen and they can click 'Back to Course': This webinar event has now finished. To log your verifiable CPD please click 'Back to Course' in the header bar above. If you are still in full screen, press the blue icon in the bottom right corner to exit first.’
- Alternatively, if this action is not completed they will see an alert with a 60 second countdown, giving them a second opportunity to log their attendance.
Step 4: Obtain your recording
Your webinar will be automatically recorded from the moment you log in to the event.
A link to the webinar will then be automatically sent to you via email after the event is completed. You will be able to download the recording in mp4 format and trim as required. You can upload this to new courses as a learning resource or send it out to your learners.
Please note: Every time you access the link to host the webinar it will trigger a recording. Therefore if you want to test hosting webinars we recommend you do this on our test site https://bigbluebutton.clicklms.com/
General troubleshooting
If your attendees appear to be having issues maintaining a connection to the webinar, please ensure they are following the recommended set up.
Do also verify that they have not been logged out due to being inactive – the patented active learning tracker will remove attendees from the webinar session if they are ‘inactive’ for prolonged periods. To resolve this issue the learner should ensure that periodically they make a mouse or keyboard interaction with the webinar.
To aid with general troubleshooting for all attendees, please refer to the below notes:
- Check they are using the Google Chrome Web browser – Microsoft Edge, Microsoft Internet Explorer and Samsung Internet are not supported and may cause user experience issues.
- We recommend using a desktop or laptop computer rather than a mobile or tablet devices.
- Ensure they have closed other apps, windows or programs – attending the webinar can use a lot of a device’s memory and could lead to a lag in audio or video playback for the attendee.
- Ensure they have a strong (preferably wired) internet connection – we do not recommend using a mobile connection (3G/4G), using a public Wifi service or accessing the webinar through a VPN.
- If the attendee cannot see the presenter’s teaching materials, ask the attendee to leave the webinar and then rejoin (this is due to the attendees’ browser not allowing ‘autoplay’ of the presenter’s materials.
- As a last resort, ask the attendee to log out of the platform, clear their browser cache and log back in.